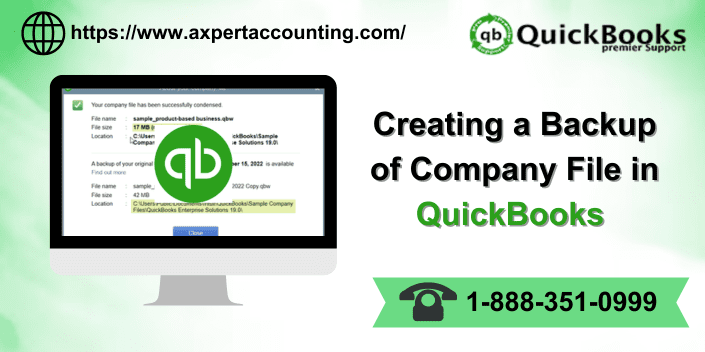
QuickBooks has revolutionized the way businesses handle their finances, payroll, bookkeeping, and inventory management. Its impact on the accounting industry is profound, streamlining processes and making them hassle-free. The extensive capabilities of QuickBooks have been instrumental in assisting companies to manage their operations efficiently. One critical aspect of QuickBooks is the storage of vital data that companies rely on. To avoid potential losses, it is crucial to prioritize data safety by regularly creating backup of QuickBooks Company file.
Regular backups not only ensure data preservation but also provide the ability to restore information whenever necessary. This in-depth guide offers a comprehensive walkthrough on how to backup data files in QuickBooks desktop, also enabling users to safeguard their crucial information for future use. We strongly recommend reading this guide thoroughly to gain valuable insights. However, should you encounter any doubts or uncertainties, don’t hesitate to reach out to our 24X7 QuickBooks support team via our dedicated support number, ++1-844-719-2859. Our team of experts and certified QuickBooks professionals will be more than happy to assist you and address any queries you may have.
Also Check This Out: How to Troubleshoot QuickBooks Error Code 1603?
Importance of Backup Files in QuickBooks Desktop
Having backup files in QuickBooks Desktop is crucial for various reasons. Several scenarios might arise where you need to utilize these backup files and transfer them to different locations. Here are some potential situations:
- System Crashes: In the unfortunate event of a system crash, having backup files ensures you can restore your QuickBooks data without any loss.
- Undo Recent Changes: Sometimes, you might need to undo recent changes made to your company data file. Backup files provide a safety net for such situations.
- Transition to a New Computer: When you purchase a new computer, you’ll want to transfer your QuickBooks product smoothly. Backup files simplify this process.
- Sharing Data: Backup files come in handy when you need to share your company file or related data with another computer.
- Data Security: Ensuring the safety of your data is paramount. Backup files act as a safeguard against data damage, loss, or tampering.
By maintaining backup files in QuickBooks Desktop, you can navigate these scenarios with ease, safeguarding your valuable data and ensuring seamless transitions when needed.
Steps for Safeguarding Your QuickBooks Desktop Company File with Backups
In any business, safeguarding critical data is crucial to ensure continuity and protect against potential data loss. QuickBooks Desktop provides reliable backup QuickBooks company file options that allow you to secure your company file and preserve your valuable information. By following these steps, you can set up automatic backups, schedule regular backups, and receive timely reminders to protect your data effectively. Additionally, we’ll guide you through the process of manual backups for on-demand data protection. Customizing backup settings and using the Express Start method for company file creation will further streamline your backup procedures. Embrace these practices to safeguard your QuickBooks Desktop company file, ensuring data security and peace of mind.
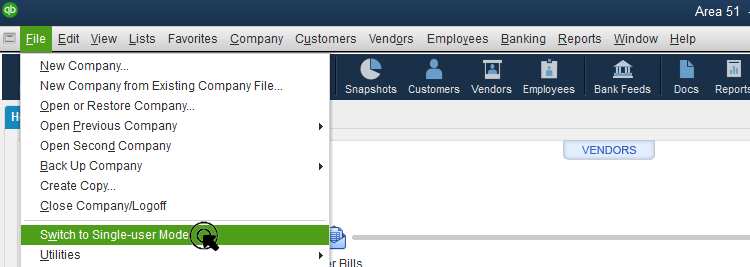
Step 1: Set up QuickBooks Automatic Backup
To protect your critical data, follow these steps to create automatic Backups of QuickBooks Company file:
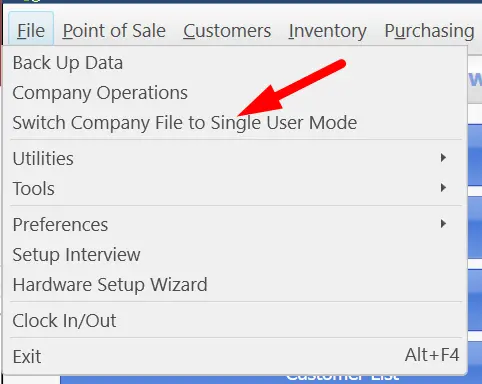
- Switch to single-user mode in the File Menu.
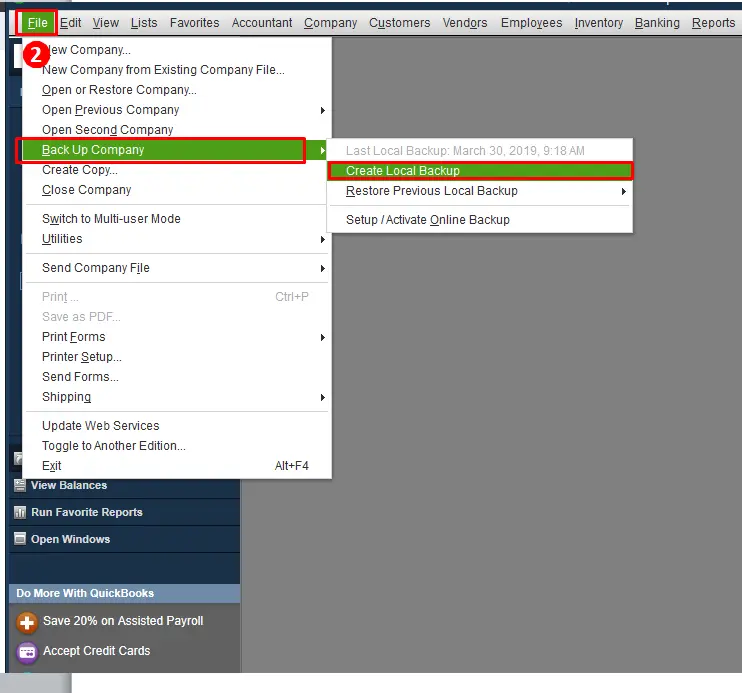
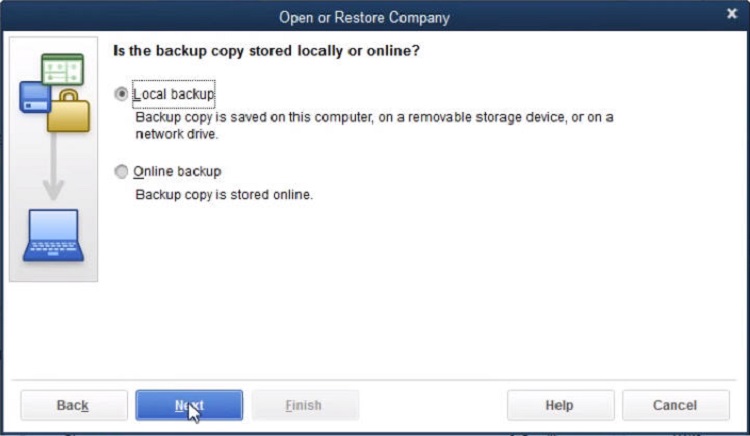
- Choose Save Copy or Backup Company and also create a local backup.

- To create local backup, select the backup copy and click Next.
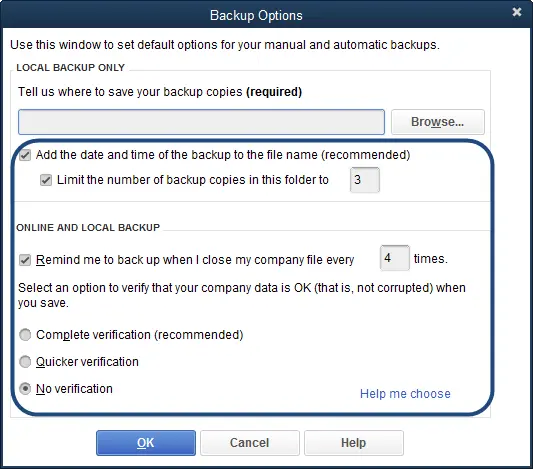
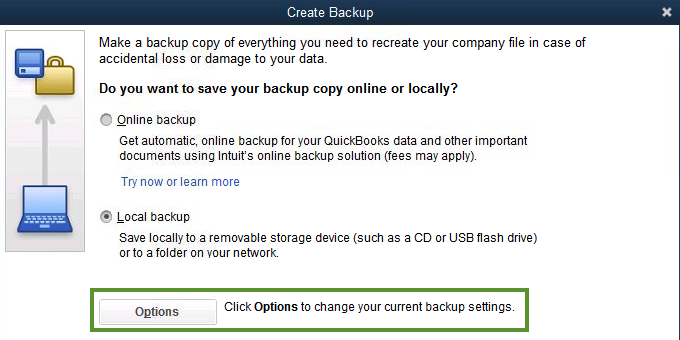
- Set up backup defaults in the Options section, then click Next.
- Determine backup frequency and the number of copies to create.
- Further, opt for data verification to receive alert messages for file damage.
- Click Browse and choose a backup location.
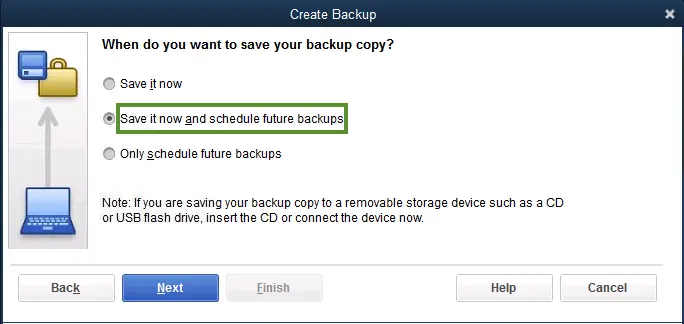
- Select Save it now and schedule future backups or Only schedule future backups then click Next.
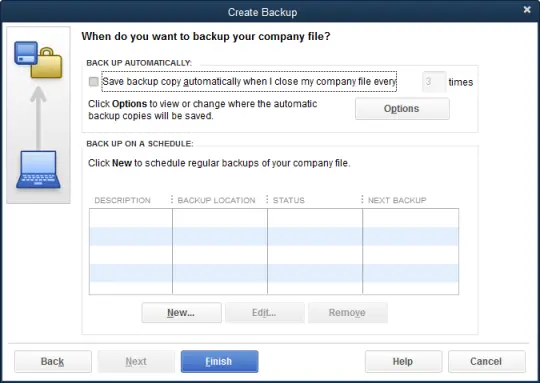
- Enter any number in that field and click Finish.
Automatic backups will ensure your data is protected and easily recoverable.
Step 2: Set Up QuickBooks Schedule Backups
To ensure regular backups, follow these steps to set up a schedule in QuickBooks:
- Click Save Copy or Backup in the file menu.
- Moreover, select Backup copy and click Next.
- Choose Options to set backup defaults, then click Next.
- Click on Only Schedule future backups option and proceed to Next.
- Set up the backup schedule and select backup folders.
- Also, specify the number of backup copies to be kept.
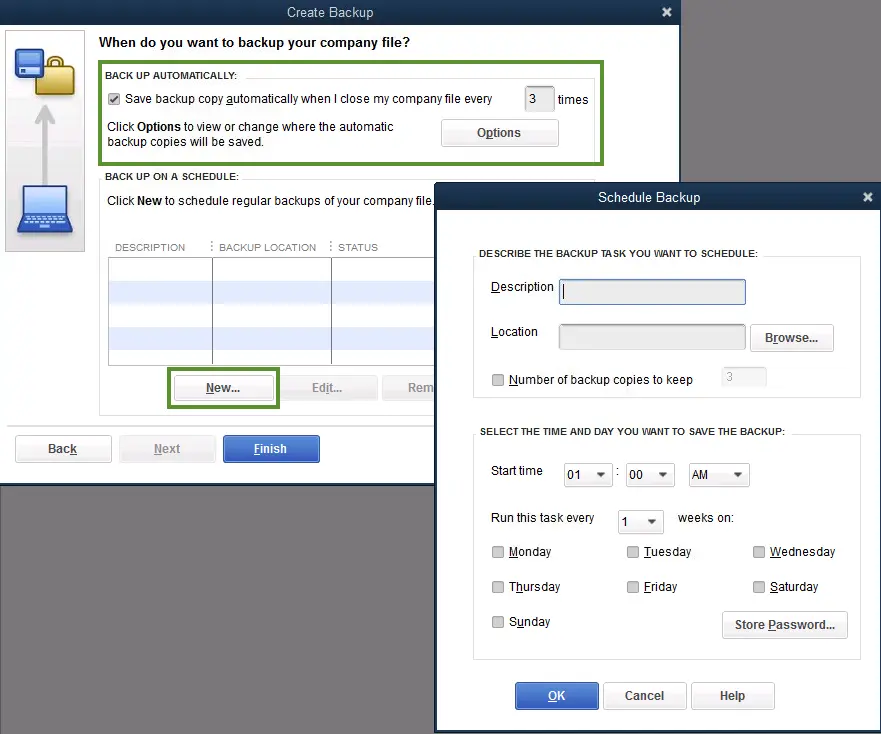
- Further, provide Windows login details and set backup frequency.
- Click OK to finalize the schedule.
Scheduled backups will keep your data safe and minimize the risk of data loss.
Also Read: How to tackle out QuickBooks Error 1723?
Step 3: Setting up QuickBooks Backup Reminders
To receive timely backup reminders, use these steps to configure reminders in QuickBooks:
- Navigate to the File menu and choose Save Copy or Backup.
- Select Backup copy and click Next.
- Also, click Options to define the backup location.
- Enable Remind me to backup when closing data and set the frequency.
- Click OK after adding the backup date and time.
Backup reminders will prompt you to safeguard your data regularly and avoid potential data loss.
Step 4: Backup Your Company File Manually
For on-demand backups, follow these steps to further manually back up your QuickBooks company file:
- In the file menu switch to the single-user mode.
- Click on Backup Company and select Create Local Backup.
- Moreover, choose Local Backup and click Next.
- Select the backup location and set the number of copies to keep.
- Test the backup file for integrity and click OK.
Manual backups provide an extra layer of data protection whenever you need it.
You can also Check: How to Set up folder and Windows Access Permissions to Share Company Files?
Step 5: Adjusting the Backup Settings
To modify your backup preferences for QuickBooks company file, use these steps to make necessary adjustments:
- To check your last backup date, hover over Backup Company in the File menu.
- For changes in backup preferences, select Create Local Backup then choose Options.
- Also, apply necessary changes and click OK.
Customizing backup settings allows you to tailor the backup process according to your needs.
Step 6: Use Express Start Method
To expedite the company file creation process, follow these steps for the Express Start method:
- Create a company file and choose Express Start.
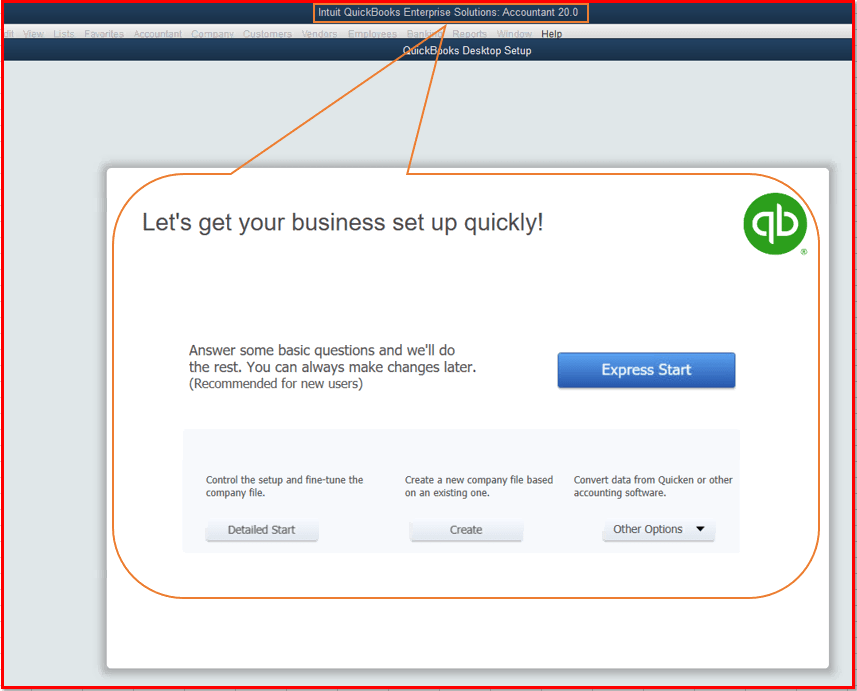
- Provide essential information in QuickBooks setup.
- Furthermore, use Help me choose for preset chart of accounts.
- Click Create Company and set up chart of accounts, customers, and services.
The Express Start method streamlines the setup process, making it quick and straightforward.
By following these comprehensive steps, you’ll efficiently secure your QuickBooks Desktop company file and ensure the protection of your valuable data. Remember to adhere to these practices regularly for data safety and peace of mind.
Restoring Backup Settings in QuickBooks Desktop
After diligently backing up your QuickBooks company file, it’s crucial to understand the process of restoring the backup file when the need arises. The restoration ensures that your valuable data is retrieved in case of any unforeseen incidents, helping you to resume business operations seamlessly. With your company file successfully restored, you can now access your financial data, transactions, reports, and all other important information that was backed up. This process is important, especially in situations where data may have been accidentally deleted or the system experienced a crash.
Have you Checked This: Easy Steps to Create a QuickBooks Desktop Company File
Winding Up
Backing up and restoring your QuickBooks company file is an essential aspect of safeguarding your business data. By diligently performing regular backups and understanding the restoration process, you can confidently navigate any data-related challenges that may arise. It is crucial to maintain a consistent backup schedule to further ensure that your most recent data is always protected. Additionally, testing the restored company file periodically can provide you with the reassurance that your backup process is reliable and functioning as intended.
Remember, should you have any questions or need assistance with the backup or restoration process, our dedicated QuickBooks enterprise support team is available 24/7 to provide prompt help. Feel free to contact our accounting professionals via our support line at ++1-844-719-2859. Moreover, as a hub of highly skilled accounting experts, we are always ready to assist you with the most relevant solutions and answers to all your queries. Don’t hesitate to contact us anytime!
Other Related Articles:
How to Troubleshoot QuickBooks Error code 1625?
