Learn how to track your loan with the help of Loan Manager in QuickBooks Desktop:
QuickBooks itself is a very useful software and QuickBooks Loan Manager is its one of the useful tools that allows a user to track payments, loans, and repayments with compounded loan. The tool also allows a user to create installments for any sum, and payment for any additional amount. In short, QuickBooks Loan Manager manages the loans as per the information given on the long-term liability and other current liability accounts. Without any much calculation, the loan manager allows you to get to the Principal amount and interest.
You may also like: How to Fix QuickBooks Error H202, and H505?
Below are some inputs on the basis of which QuickBooks Loan Manager shows the ‘payments over multiple periods’, i.e. Amortization schedules:
- Loan Amount
- Original date
- The payment Amount
- Escrow payment amount
- Interest rate
- Compounding period
- Payment A/C chosen from COA
- Fees account chosen from COA
Read Also: How to Set up Multi-User Network in QuickBooks desktop?
Follow the steps to set up your QuickBooks Loan Manager:
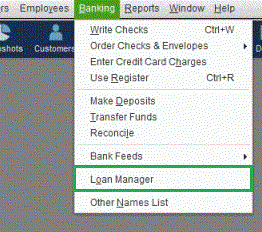
- From the QB Loan Manager, click on Banking
- Click on Add a Loan and put in all the necessary details
- Click on Account name; a dropdown list will appear. Choose long-term liability account
- Choose payee from lender drop-down list
- Fill details like the date of origin
- The Terms list will appear; from this list, select one: Weeks, Months or Years. Click Next.
- Select a payment method and fill interest rate.
- After choosing compounding rate, click on your bank account from Payment Account list.
- Choose the Interest Expense Account and click on Finish.
Here are the steps by which you can record a loan in QuickBooks desktop:
Step 1: Business Loan Establishment in QuickBooks
- Click on Gear icon and choose Chart of Accountants from the Company list
- On the basis of your loan type, change the Account Type; Either to Other Current Liabilities or Long-term Liabilities
- After this, change the Detail Type to Loan Payable
- Put the name of the account and Save and Close
Read this also: How to Resolve the QuickBooks Error 1310?
Step 2: Enter Opening Balance
- Click on the Plus icon and choose Bank Deposit from the list
- From the drop-down list, select the account in which you want to deposit the loan funds
- Now, enter the deposit date
- In Account column, enter the loan payable account that is created along with the amount
- Now, Save and Close
Step 3: Record the Loan Payment
- Click on the plus icon and select Check from Vendors list
- If you are sending an original check, then enter the check number
- And if you are about to withdraw an amount, then enter Debit in Check box
- After these steps, enter the details given below:
- Liability account for loan and amount of payment
- Expense account for interest and amount
- Additional fees along with appropriate accounts
- Now, Save and Close.
Here’s how you can set up loan tracking in QuickBooks loan manager
- If no vendor has given you any loan, then create a vendor for Bank/Financial institution.
- Enter the ‘initial loan’ amount which will be your Opening Balance or Transaction. Enter the Loan Origination Date. If you have already made the payments to your loan, then fill the journal entries.
- Establish an account which is similar to the Expense account in order to store the Payments and Fees.
- If you need, you can also create an Escrow account.
Learn about Escrow Account and Escrow Amount:
Escrow Amount: Till the time your loan formalities are completed, the third-party puts a specific loan amount in the account that is known as Escrow amount. Such account is Escrow account is similar to QuickBooks asset account. This account looks after the Escrow portion of your loan payment and can be used to pay taxes. Following the steps below, you can set-up your Escrow account:
- From Lists menu, click on COA
- Now, select Account
- Choose ‘Other Account Type’ and select ‘Other current asset’. Now, Continue
- In the ‘Account name’ section, fill the name of account
- Give a small description about your account (optional)
- Save and Close
How can you track Loans and Repayments through QuickBooks Loan Manager?
- In the Banking menu, click on Next and choose ‘Add Loan’
- Enter the following account details and then, click on Next:
- Put the Account name (previously made Loan account name)
- Name of Lender
- Date from which your Loan originates
- Original amount of the loan
- Total time to repay the loan
- Put the details of Loan and then press Next:
- Click on ‘Due Date of Next’
- Amount to be paid in a specified period
- Next payment Number in case you have previously made payments
- Escrow account details
- Click on ‘Alert me ten days before the payment due date’; choosing this is optional.
- Enter the information of Loan Interest and click Finish:
- Enter the interest rate of the loan.
- Compounding period.
- Details of Bank account from which you will repay the loan.
- Interest Expense A/C through which the interest will be tracked.
- Enter fee/charges expense.
- Check the Loan Info and if you wish to edit something, then click on “edit loan details”.
Read Also: How to Rename the Qbprint.qbp file in QuickBooks Desktop?
Winding up!
This is how you will be able to setup QuickBooks Loan Manager and utilize it. If you face any issues while setting it up, then you can contact our QuickBooks premier technical support expert on our toll-free number i.e. +1-844-719-2859.