QuickBooks is the most popular accounting tool used by small and medium-sized businesses today. QuickBooks Desktop is known for its amazing features that keep the company’s data safe and secure. Any sort of information stored in QuickBooks needs to be auto-saved or a backup should be created in case an error occurs. Errors in this software are quite common and can cause data loss. But there are some cases when a user does not create a backup due to any problem like a power outage or virus attack. So, to keep your data safe to avoid such situations restoring the lost data or QuickBooks files is very important. In this article, we are going to provide you insights into create and open portable company files in QuickBooks Desktop. You can also contact our customer support team for more assistance if you don’t want to do suck tasks and want help. To get in touch with our experts you can contact us at our toll-free helpline number i.e. ++1-844-539-0188.
You may also like: Convert a QuickBooks for Windows file to QuickBooks for Mac
What is QuickBooks Desktop Portable Company File?
- A QuickBooks Portable Company File is a compact copy or replica of financial data that is sent via email or portable media such as flash memory or an external drive.
- This file does not contain templates, text, images, or logos.
- Also, transaction log files (*.tlg) are not included.
- QB Desktop is a great and proficient tool for resolving data issues as it re-indexes data when restoring portable company files.
The important points to keep in mind
Before troubleshooting, make sure your QuickBooks software is up to date.
- In all QuickBooks versions, you must be logged in as an administrator to create and return a portable replica or copy.
- When you provide a portable copy to someone, that person is automatically granted full access to her QuickBooks, allowing them to add/modify transactions and change the administrator password.
- If you are trying to resolve a data issue, avoid overwriting the original file when restoring the portable copy.
- The best way is to rename the original file before restoring the portable company file.
- When sending your company’s files to your accountant, consider using your accountant’s copy.
Steps to Create/Configure a Portable Company File
- Go to the File menu and select Make a Copy.
- Select Portable Company File and click Next.
- Find a location to save the portable copy.
- Select Save and then OK.
Fixed Assets Manager (FAM), QuickBooks Statement Writer (QSW), and Loan Manager (LMR) are not restored in Portable Files.
If you restore a company’s portable files to a computer other than the computer where QuickBooks Company is saved. In that case, you will no longer be able to access information from QuickBooks Statement Writer (QSW), Loan Manager (LMR), or Fixed Asset Manager (FAM). To avoid this situation, simply copy all folders and files to the location where your current company files reside.
Loan Manager: Copy or replicate the.Imr file ([Company Name].Imr) to the current location where the current company file/files exist. Later, restore it.
Fixed Asset Manager: Copy or replicate the entire files from the folder specified below the location where all the company files exist and then, restore it.
QuickBooks 2018
C:\Users\Public\Documents\Intuit\QuickBooks\Company Files\FAM17\clients
QuickBooks 2017
C:\Users\Public\Documents\Intuit\QuickBooks\Company Files\FAM16\clients
QuickBooks 2016
C:\Users\Public\Documents\Intuit\QuickBooks\Company Files\FAM15\clients
Steps to create and open a portable company file in QuickBooks Desktop
The steps to create and open portable company file are as follows:
Step 1: Updating QuickBooks Desktop

Before starting, the user needs to update QuickBooks to the latest version.
Step 2: Create a backup
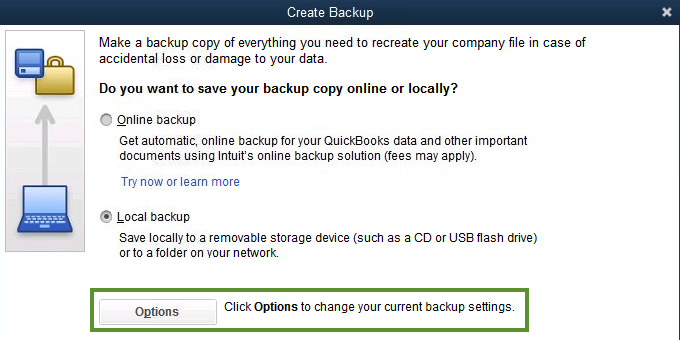
In order to share or move accounting data around and when you don’t need a full backup, portable company files work great. A portable company file isn’t any replacement for a full backup. Also, it doesn’t include the message templates, logos, images, or templates. Moreover, it doesn’t include: .tlg or .log files, loan manager, statement writer, or fixed asset manager files. The user can complete the back up the company files, and follow the steps to create a backup company file.
See Also: How to Fix QuickBooks Error 6150, 1006?
Step 3: Creating a portable company file
- The user can open QuickBooks and log in as an admin
- And then, move to the file menu and choose create copy
- Also, choose portable company file and hit next
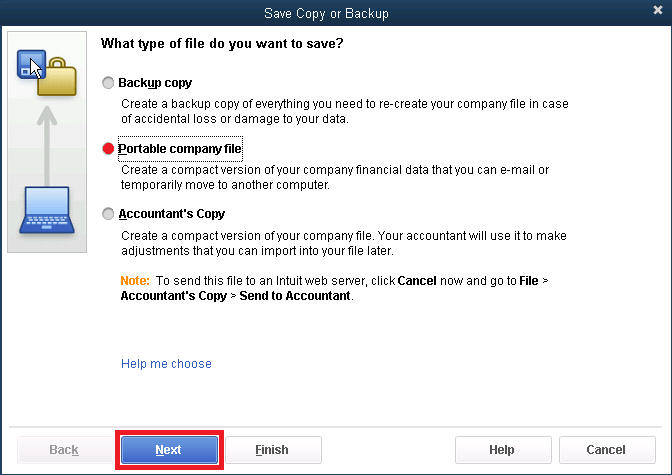
- Once done with that, the user needs to assign a name to the file.
- And then choose a location to save the portable company file. And pick somewhere that’s easy to spot, like windows desktop.
- After that, select Save and hit OK button.
Step 4: Opening a portable company file
In order to open a portable version of company file:
- The user will have to open QuickBooks and log in as an admin
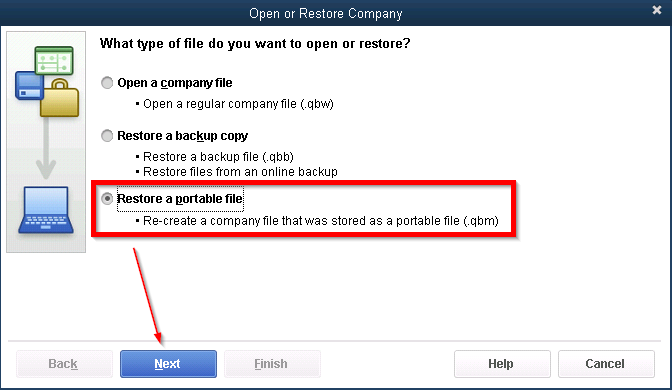
- After that, move to the file menu and choose open or restore company
- The next step is to select restore a portable file and choose next
- Now, select the portable company file. And then select open.
- After that read the notes on the where do you want to restore the file page and then hit next
- The last step is to select save, once you are ready to open the file.
When the user opens the file, QuickBooks will automatically re-index the data. And this will fix the issues.
Why should you use this tool?
The components that compress and decompress files have changed significantly between newer versions of QuickBooks and earlier versions (prior to 2010). This makes the backup file incompatible with different versions. This tool uses company files backed up in QuickBooks 2010 and later versions to create a restored company file that can be opened in versions earlier than QuickBooks 2010.
Note: This tool only works on backups created during the previous conversion.
Steps to use this tool:
- For previous QuickBooks versions, go to the File Menu, select Utilities, and click Restore Backup.
- A button (…) appears next to the Backup field.
- Select “File Name”.
- Select Backup Company File and click Open.
- A Save in drop-down menu appears.
- Select a folder to save the file.
- Save the file with a unique name to avoid overwriting existing company files.
- •Click OK.
See Also: Move your QuickBooks Desktop file to QuickBooks Online
Conclusion!
By the end of this article, it is expected that the user will be well versed with the process to create and open portable company files in QuickBooks desktop. However, if you face any difficulty or in case of any query, or if you need any sort of technical assistance, give us a call at our toll-free customer support number i.e. +1-844-539-0188. And our QuickBooks desktop support team and ProAdvisors, will ensure to provide you with immediate technical assistance.
The size of your QuickBooks company file depends on which version you’re using. For QuickBooks Pro and QuickBooks Premier, the file can be up to 250 MB. If you’re using QuickBooks Enterprise, the maximum size is 1.5 GB.
A portable company file is like a mini version of your main file. You can easily send it by email or save it on a USB stick.
1. Open QuickBooks as an admin.
2. Go to the File menu and click on Open or Restore Company.
3. Choose Restore a Portable File and click Next.
4. Pick where to save the file, and save it.
The file format is .qbm (QuickBooks Portable Company File). It’s like a special backpack for your QuickBooks data. This file has all your money info but doesn’t carry any extra stuff like attachments or logos.